

How to Check Fabric Thread Count
Table of Contents
- What Is Thread Count and Why It Matters
- What You'll Need to Measure Thread Count
- Step-by-Step: How to Calculate Thread Count
- Thread Count vs. Fabric Density: Understanding the Difference
- How to Check Fabric Quality for Quilting
- Measurement Accuracy and Common Errors
- Verifying Thread Count Claims on Labels
- Frequently Asked Questions
Last Updated: October 18, 2026
What Is Thread Count and Why It Matters
Thread count is the total number of threads woven into one square inch of fabric, both lengthwise (warp) and crosswise (weft). To check fabric thread count, you count both the warp and weft threads in that one-inch area. It affects how your fabric feels, how long it lasts, and whether it suits your project.
How Thread Count Is Calculated
Count the threads in one square inch, then add warp and weft together. If you count 100 warp and 100 weft threads, the thread count is 200.
The calculation looks like this:
Thread Count = Warp Threads per Inch + Weft Threads per Inch
Warp and Weft Threads Explained
Warp threads run lengthwise (up and down); weft threads run crosswise (left to right). They interlace to create the weave structure.
- Warp threads are the foundation threads that stay stationary on a loom
- Weft threads are woven over and under the warp to create the fabric
When you check fabric thread count, you're counting both directions.
What You'll Need to Measure Thread Count
Accuracy depends less on expensive tools than on preparation and technique: isolate a clean square inch, hold the fabric flat, and magnify enough to see individual yarns.
Using a Fabric Thread Counter
A fabric thread counter (counting glass or pick glass) is a small magnifier with a marked opening, usually one inch square.
How to use one correctly:
- Place the counter flat on the fabric with the marked square aligned to the warp and weft directions, not tilted diagonally.
- Press gently so the fabric lies flat but is not stretched.
- Look through the magnified opening and count the threads crossing one edge of the square, then the threads crossing a perpendicular edge.
A basic counting glass runs about $10 to $40; models with a built-in inch scale or locking focus cost more. For occasional checks, an inexpensive model is sufficient, accuracy comes from counting discipline, not price.
Measuring Without a Thread Counter
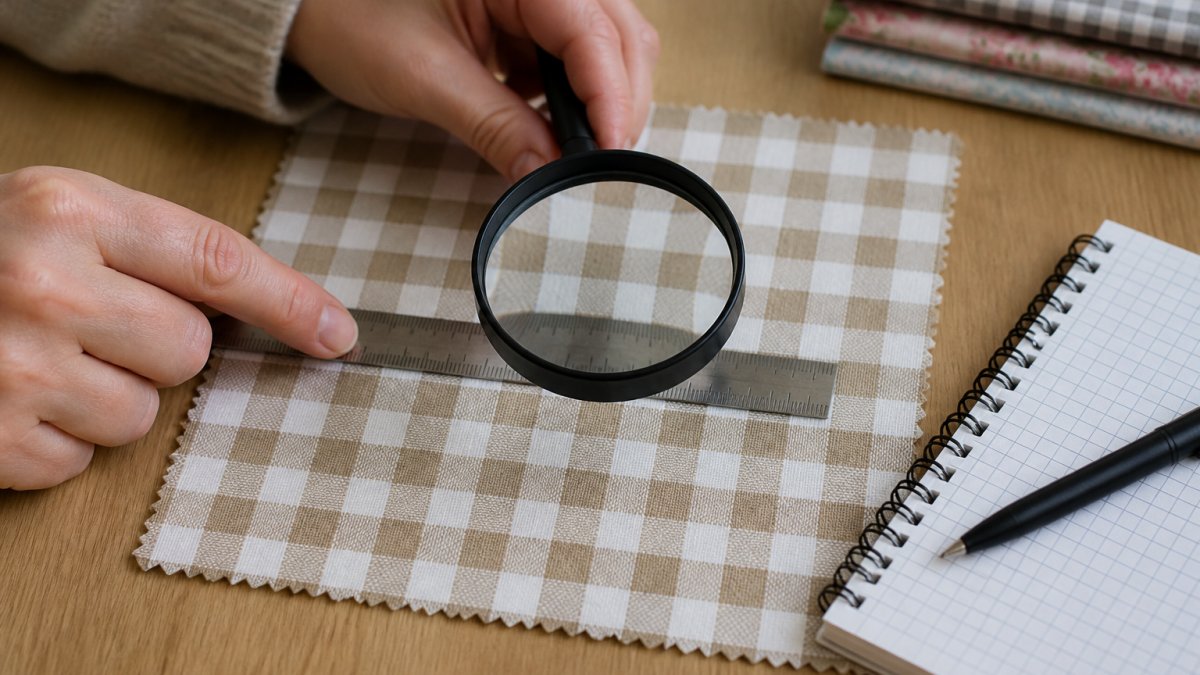
You don't need a specialized tool. A clear ruler and a magnifier produce a usable count if you control the variables.
What to gather:
- A clear ruler with fine markings, ideally with both inch and millimeter scales
- A handheld magnifying glass, a loupe, or a smartphone camera with zoom and a grid overlay
- A fine-tip marker or tailor's chalk for marking the measurement square
A practical no-counter method:
- Lay the fabric flat on a hard, clean surface. Smooth wrinkles by hand; do not iron a sample you plan to return.
- Align the ruler's edge with a visible warp thread so the inch markings run parallel to the warp.
- Mark a one-inch span along the warp and a one-inch span along the weft, forming a square.
- Using the magnifier, count the warp threads crossing the one-inch weft span; use the pin tip to separate clinging threads.
- Count the weft threads crossing the one-inch warp span.
- Add the two counts.
Accuracy limits of the no-counter method:
- Ruler markings are coarser than a counting glass opening, so a sixteenth-of-an-inch alignment error can shift a count by several threads in fine fabrics.
- Smartphone zoom distorts near the frame edges; keep the square near the center.
- Without a fixed opening, it's easy to drift. Mark the square clearly and count edge-to-edge.
Most crafters use the ruler-and-magnifier method for a quick check and reserve a counting glass for fine weaves or when the label claim matters.
Preparing the Fabric Sample
Preparation prevents most counting errors. Use a sample at least two inches by two inches so the one-inch square sits well inside the edges, and avoid seams, hems, printed regions, and areas stretched on a bolt or sharply folded.
On the bolt, measure at least two inches from the cut edge and away from the fold; selvedges often weave tighter and won't represent the body.
Step-by-Step: How to Calculate Thread Count
Checking fabric thread count follows a straightforward process, take your time with each step.
Counting Threads Per Inch
Step 1: Prepare your fabric sample
Lay the fabric flat on a clean work surface and smooth wrinkles.
Step 2: Mark your measurement area
Lightly mark a one-inch square with pencil or chalk.
Step 3: Count the warp threads
Count every lengthwise thread crossing your marked square. Write down the number.
Step 4: Count the weft threads
Count the crosswise threads through the same square. Write down this second number.
Step 5: Add the counts together
Add warp and weft counts. This total is your thread count.
Example: 120 warp + 120 weft = 240.
Recording Your Measurements
Keep a simple record to compare fabrics and track quality over time.
Create a record like this:
| Fabric Name | Warp Count | Weft Count | Total Thread Count | Date |
|---|---|---|---|---|
| Cotton Quilting Print | 120 | 120 | 240 | Oct 2026 |
| Linen Blend | 95 | 105 | 200 | Oct 2026 |
| Sateen Weave | 140 | 110 | 250 | Oct 2026 |
Over time, your records reveal which fabrics perform best for your projects.
Thread Count vs. Fabric Density: Understanding the Difference
Thread count and fabric density are related but not identical. This distinction matters when you're evaluating fabric quality.
Thread count measures threads per square inch; fabric density is how tightly they're packed.
A 200-count fabric with tight weaving feels smoother than a 250-count with loose weaving, so thread count alone doesn't tell the whole story.
For quilting or home décor, assess both:
- Count the threads for thread count
- Feel the fabric for density
- Inspect the weave for durability
A well-constructed fabric combines good thread count with appropriate density for its intended use.
How to Check Fabric Quality for Quilting
Thread count is one quality indicator, but quilters should evaluate several factors.
Smoothness and Yarn Ply
Smoothness comes from yarn construction and weave tightness. Yarn ply is how many strands are twisted together.
Single-ply yarn makes a lighter, more delicate fabric; two- or three-ply makes a stronger one that holds up better through quilting and washing.
Run your fingers across the surface: quality quilting cotton feels smooth without pilling. If it snags easily or feels scratchy, the ply or weave may not suit quilting.
Weave Structure and Durability
Interlacing determines durability. Plain weave (most common for quilting cotton) is balanced and strong; sateen weave is smoother but may be less durable for heavy use.
Examine how evenly threads cross: uneven weaving signals quality-control issues, while consistent weaving holds up through multiple projects and washings.
Measurement Accuracy and Common Errors
Thread count comes from a small area, so small mistakes become large percentage errors. A ten-thread drift from poor alignment or double-counting can swing the total by several percent, knowing the error sources is the difference between a number you can trust and one you can't.
Sources of Error and How to Control Them
Fabric stretch. Pulling fabric taut spreads the weave and lowers the count.
Sample size. Coarse fabrics may have too few threads for a stable one-inch count.
Counting technique. The most common error is counting an edge thread twice.
Lighting and magnification. Dark yarns on dark backgrounds vanish in poor light.
Measurement location. Seams, hems, prints, and selvedges differ in density from the body.
A Repeatable Accuracy Check
A simple three-count protocol catches most errors:
- Count the same one-inch square three times, recording warp and weft pairs separately.
- If the totals agree within about two to three percent, accept the average.
- If they diverge more, move to a second square at least six inches away and repeat.
- If two squares disagree by more than about five percent, the fabric may be inconsistent or your technique needs adjustment.
No lab equipment needed, just patience. The first count on a new fabric type is usually the least reliable; accuracy improves as your eye learns the weave.
Woven Versus Knitted Fabrics
Thread count is a woven-fabric measurement assuming two yarn sets, warp and weft, interlacing at right angles. Knits are interlocking loops of a single yarn system, so warp-and-weft counting doesn't apply.
For knits, measure what matters instead:
- Stitch density: count the number of wales (vertical columns of loops) and courses (horizontal rows of loops) per inch, then multiply to get stitches per square inch.
- Gauge: the number of stitches and rows per inch, often stated on yarn labels for hand-knitting.
- Fabric weight: ounces per square yard is a common trade measure for knits and is often more useful than a stitch count for judging substance.
If a label applies thread count to a knit, treat it as marketing rather than a standard measurement, and judge the fabric by weight, stretch recovery, and surface hand.
Worked Example
Suppose a quilting cotton shows 118 warp and 122 weft threads in a one-inch square: 118 + 122 = 240.
If the totals were 240, 252, and 228, the roughly ten percent spread suggests an inconsistent weave or a counting error. Recount with a pin to separate yarns and check the lighting before blaming the fabric.
Verifying Thread Count Claims on Labels
Labels state thread count, but not all are accurate, verify claims by measuring yourself.
Buy a small sample, count the threads using the method above, and compare to the label claim.
Most quality fabrics fall within five to ten percent of the stated number; a difference over fifteen percent suggests a misleading label.
If you purchase from us and want to verify thread count yourself, we're happy to discuss your measurements.
Checking fabric thread count gives you control over your quilting and sewing projects, so you choose fabrics with confidence. When you're ready to stock up, Things Fabric offers a curated selection of high-quality quilting cottons.
Frequently Asked Questions
How do I check the thread count of my fabric if I don't have a thread counter?
Use a ruler and magnifier or magnifying glass to count threads manually. Place the ruler along the warp (lengthwise) threads and count how many threads fit in one inch. Repeat for the weft (crosswise) threads. Add both numbers together for the total thread count. This method works well for woven fabrics and requires patience but produces accurate results without specialized tools.
What's the difference between thread count and fabric density?
Thread count measures the total number of threads (warp plus weft) in one square inch of fabric. Fabric density refers to how tightly those threads are packed together. A fabric can have the same thread count but different density depending on yarn thickness and weave structure. Higher thread count generally indicates better quality, but density also affects how the fabric feels and performs.
Does higher thread count always mean better-quality fabric for quilting?
Higher thread count usually indicates better quality, but it's not the only factor. For quilting cottons, thread count between 60 and 80 threads per inch is typical and provides good durability and smoothness. Yarn ply (how many strands are twisted together), weave structure, and fiber content matter equally. A lower thread count with high-quality cotton and tight weave can outperform a higher count with poor construction.
How do I know if a fabric label's thread count claim is accurate?
Verify by measuring a sample yourself using the step-by-step method outlined in this guide. Count threads in multiple areas of the fabric, as thread count can vary slightly. If your measurements differ significantly from the label, the fabric may have been mislabeled or the count may refer only to warp threads rather than the combined total. Always measure before making large purchases for important projects.